Last Call
If you use a dispensing keg by racking your cold crashed but unfiltered beer, you will end up with some trub at the bottom of the keg which when it comes time to clean is a fairly simple task IF you have small enough hands and forearms.
Over the last 2 years I’ve been experimenting with dry hopping in the dispensing kegs amongst other additions and these additions can result in some stubborn stains/residues in the keg.
It can take a considerable amount of water sprayed in at high pressure to dislodge residues, a resource and time consuming process.
Cleaning In Place
Cleaning in Place (CIP) has been around for approximately 50 years, and is commonly used in hygiene critical industries, such Food, Beverage and Pharmaceutical, to clean a wide range of plant. CIP refers to the use of a mix of chemicals, heat and water to clean machinery, vessels or pipe work without dismantling plant. The process can be one shot, where everything goes to drain, or recovery, which recycles most of the liquid. Overall, CIP can be a very efficient way of cleaning.
I decided I would work with a recovery system which I can then pump out to drain.
The Design
I figured the setup would be connected to my Brewery’s wash area (large sinks and sprayer taps). Effectively I would need:
- a CIP spray device that fits inside the keg
- a pump that can create enough pressure to operate the CIP to an acceptable level
- a way of timing the clean
- a way of draining out the waste liquid
- minimal connections / established connection methods to minimise complexity and cost

The Parts Required
Below are the parts you will need to build one keg cleaning system. You can easily adapt my design to more than one keg by adding more lines.
THE CIP spray device
I found this nice CIP rotating ball with a DN15 female (1/2BSP) thread.

This is CIP head I used. A really good price too.
http://ali.pub/2974r1
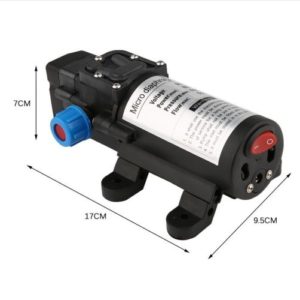
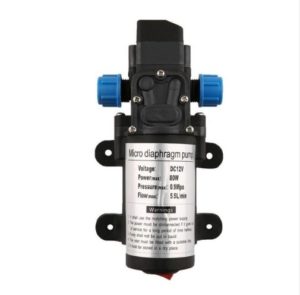
THE PUMP
Mains water pressure here is around 120-130psi. The pump below is economical, runs off 12V and has DN15 male fittings (standard water fittings in Australia).
Specifications:
- 12VDC @ 7A (Approximately 80W)
- 5.5Litres/min flow rate
- 0.9Mpa / 130.5psi / 9 bar maximum pressure
I got the pump from here. It was the cheapest price I could find. The store had a 48% off sale (so wait for that).
http://ali.pub/2974m6
IMPORTANT: Make sure you ask for the DN15 version (Type D) of inlet and outlet. OR you can replace the braided hoses with clear PVC tubing to suit the M18x1.5 stock thread with barb.
If you want to use the M18x1.5 version, you will need these adapters:

http://ali.pub/2b6269
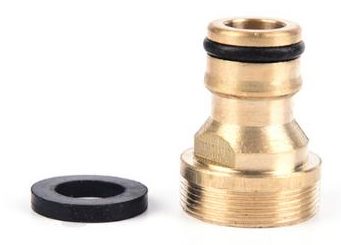
Then you can use the normal garden style disconnects:

12V 10A Power supply
I used a power supply designed for LEDs slightly overrated to the requirement to ensure longevity.

I got my adapter here. It comes in various plug configurations. Make sure you pick the right one for your region and to suit the pump’s DC input.
http://ali.pub/2974zl
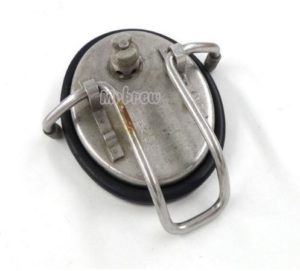
The Keg Lid
In my design, you take off your existing keg lid and fit this keg lid which has the CIP cleaning head attached to it. The Lid is optional if you wish to keep the costs down but this way you can run the keg in any direction for cleaning.
The lid will need to be modified to adapter the CIP head to a bulkhead connector to attach to the output of the pump.

Options:
Used Keg Lid. If you want to save some money get this used keg lid which you will modify anyway.
http://ali.pub/29759i
Brand new keg lid.
http://ali.pub/2975ao
Various Bits
You will need the following bits to complete this setup.
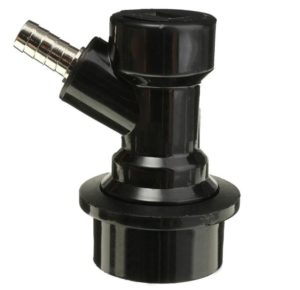
Cornelius Keg liquid disconnect
Barbed version is acceptable here as you will be connecting hose directly to it. I use these disconnects and they are a damn sight better than the cheap rubbish out there and also cheaper than the original Cornelius ones http://ali.pub/2975zd
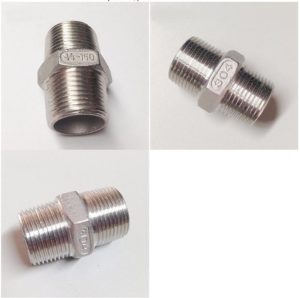
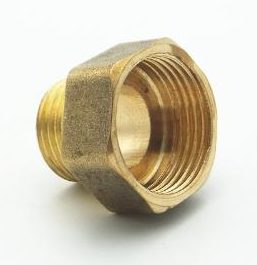
Stainless steel DN15 male to union
This is to connect the CIP head to the pump’s output line. http://ali.pub/297666
UPDATE: I have changed this to a nylon version which has orings. I find this will seal the union better than stainless steel. However note, if you are running high temperatures stick to stainless steel!

http://ali.pub/297bc9
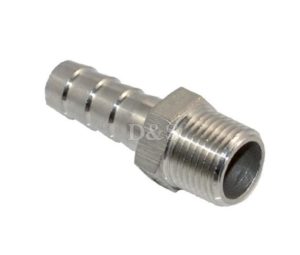
Stainless steel DN15 to 8mm barb
This is to adapt the cornelius disconnect barb to the DN15 hose to the inlet of the pump.
http://ali.pub/2976go
DN15 Stainless steel braided water hoses
I recommend you use mains water pressure rated hoses for this job as you are dealing with high pressure and possibly temperature. This was a bargain. You get four hoses for the price… http://ali.pub/2976bm
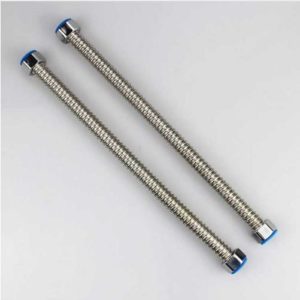
Choose your lengths to suit your setup. I used 60cm versions. You will need two of them (Pump inlet and outlet).
Mains Timer Switch (up to 60mins)
I used this timer switch to let the cleaning go for the time I need it to go for without manual intervention required.
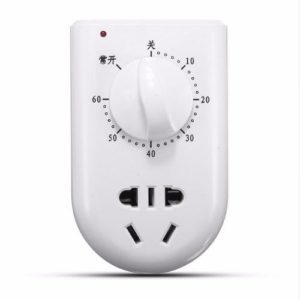
Specs:
- Plug Type: AU Plug but choose the one you need for your setup
- Voltage: AC 220V/50Hz (Again, choose what you need)
- Max power: 2200W (plenty for this setup)
- Setting Time: 2-60 Minutes (plenty for washing a keg)
http://ali.pub/2978bd
Sundries
You will also need a short length of 6mm ID 8mm OD beer dispense hose (hard clear stuff NOT the soft PVC/silicone). The length is up to you but I recommend you keep it short as its not that flexible. I kept the length to 100mm; enough to adapt the disconnect to the 8mm barb to male DN15 adapter.
You may require some plumber’s teflon tape to connect the DN15 male union to the CIP head.
You will also require a step drill to 19mm/20mm to drill out the keg lid.
Putting it together
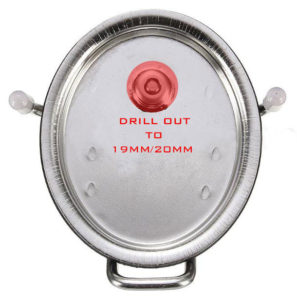
- Drilling out the lid. You may choose to retain the safety relief valve and drill a completely separate hole but in this setup you do not need it so I drilled out the safety valve recess to 19mm/20mm so that the DN15 union fits through snugly. NOTE. You do not want this loose.
- Use thread sealer and fit on the CIP head to the keg lid.
- Keg Lid modification Done. NOTE: It can be a little bit tricky to get this to fit into your keg but once you figure out the motion it will easy to remove/fit.
- Connect one of the DN15 hoses to the other side of the DN15 union on the keg lid.
- Connect the other end of this hose to the pump’s output side.
- Fit the beer hose to the disconnect. Note that no hose clamp is required.
- Fit the other end of the hose to the barb end of the DN15/Barb adapter.
- Connect the remaining stainless steel hose to the DN15 barb.
- Connect the other end of this hose to the pump’s inlet.
- Youre done!
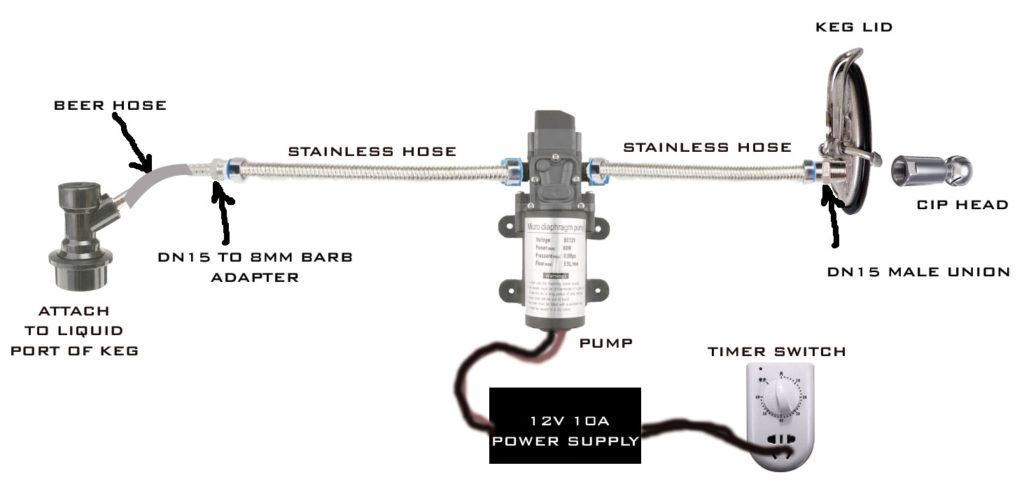
You should have a setup as shown below in the diagram.
I hope you will enjoy putting this cleaning system together for your setup!
Updated Design 2018
I ended with the M18 version of the pump. Here is my new configuration:

Parts required
DN15 (1/2″) MALE to DN20 (3/4″) FEMALE Adapter http://ali.pub/2cuval
DN20 (3/4″) FEMALE to 16mm quick connect MALE http://ali.pub/2ew6yp
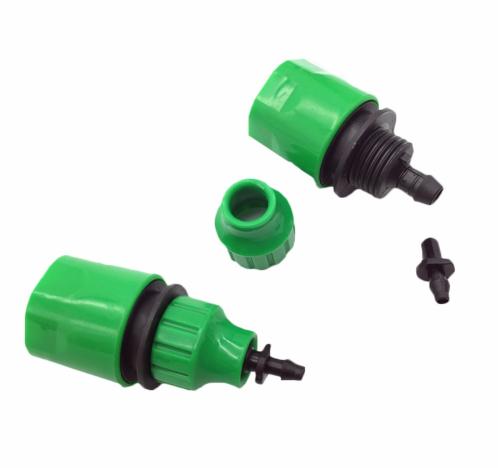
16mm quick connect FEMALE to 1/4 barb http://ali.pub/2cuvum
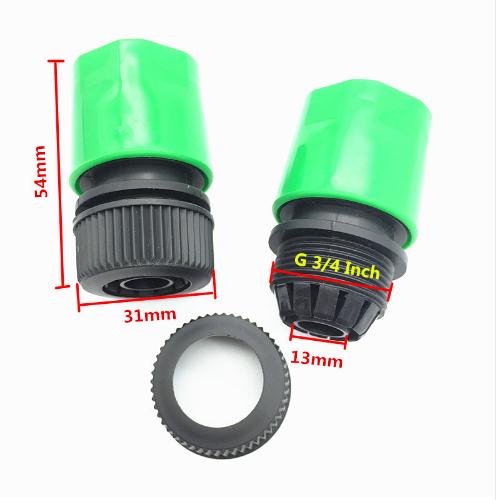
16mm quick connect FEMALE to 13mm (1/2″ ID) hose http://ali.pub/2cuvxx

OPTIONAL: Adapter for QC. If you want to extend pipes. http://ali.pub/2cuw18