If you’re growing your own wheatgrass, you have probably realised by now that it will grow without soil as a medium.
My 9 day old super-healthy wheatgrass growing happily
in a tray If only my lawn looked this good 😉
Here’s how I do things. All the bits are available a well stocked hardware store like Bunnings.
Parts Required
– Good quality planter pot drip tray (340mm preferred)
– Quantity of Natural jute matting (hessian) as used for erosion control
– Sharp Scissors
– 1L glass jar with lid
– Square piece of aluminium cyclone wire (fly netting)
– A thick postal rubber-band
– Quantity of wheat (winter wheat berries from the health store) aka Cleaned Wheat.
The Sprouting Jar
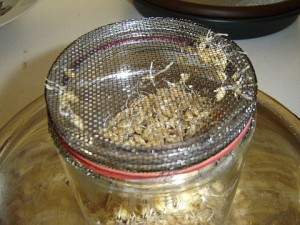
The first thing you have to make is a device for sprouting the wheat berries before the “planting”. The method I use is well documented on the net and all I have done is used local materials to achieve a low cost solution. The sprouting jar is basically a normal glass jar with a lid made out of cyclone wire; which is a powder-coated aluminium mesh that is used in screen doors to keep the bugs out. All you do is cut a piece slightly over sized and then use the screw lid of the jar to force it down onto the threads. This will form the threads into the mesh making it easier to keep it on there. Once the lid has done its job it can be put away.
The mesh copy of the lid is now held on using the rubber band.
What a mesh! Held securely with a band.
 The mesh was forged into the threads with the lid as the die.
Nutrient solution
You can make your own wheatgrass nutrient solution at home. You will need the following:
– 500mL small spray bottle (get a good quality one as it will last the test of time)
– A 1 or 1.5L PET bottle for mixing and storing.
– A bottle of fresh clean sea-water (filtered using coffee filter paper)
– Ormus
– Sheets of Nori (Japanese sushi seaweed sheet) or Kelp pieces
– Unprocessed sea-salt, the dark grey or pink stuff (Celtic Sea Salt / Himalayan Sole)
Basically, the ratio is as follows:
For every 1 Litre of nutrient solution, you have:
80mL of filtered fresh seawater (roughly 1/3 cup)
10mL of ormus (2 tsp)
1 tsp of unprocessed sea-salt
1 sheet of Nori (rolled so it can be slipped through the neck of the bottle).
890mL of filtered water (RO, filtered, or relatively fresh rainwater)
Mix up the solution thoroughly to dissolve the salt and ormus and the Nori will start to break down giving the solution a brown tinge. Filter some out and put it into the spray bottle for use during the misting stage of growth. The rest can be fed directly into the tray onto the bottom UNDER the wheatgrass root mass. Keeping the top dry ensures there will be no mold.
One bottle should last one growth cycle of a tray.
Once you have made the nutrient solution, you can start the process as detailed below.
Step 1: Soak the Wheat
The wheat needs to re-hydrate itself. The quality of water you use now is important. I use filtered water with 2 tsp of ormus. This ensures that ormus will be drawn up into the seeds. Fill the jar close to the top and let it sit in a dark cupboard for about 12-18 hours. 24 hours is OK. I have noticed that at the end of the soaking process, a large number of tiny bubbles rising through the water layer…perhaps some of the excess ormus escaping?
Step 2: Sprout the Wheat
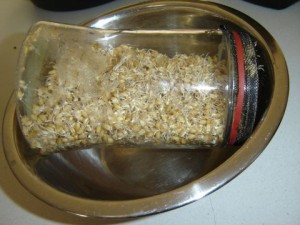
After the 18 hour soak process, merely turn the jar upside down over a sink to drain out the excess water. DO NOT wash it at this point as we want to maximise the wheat’s exposure to the ormus. Once its drained, place it at 45 degrees like in a dish-rack or something. I have found a nice way to store it in the dark. I place the jar inside a container or colander with a rounded base. This causes the jar to sit at about 45 degrees while collecting the excess water.
After 2 days of sprouting. Keeping the wheat moist not wet.
Give the seeds a wash and drink every 8 hours for 3 days, or until the root part looks like its about 1cm or longer. The picture above shows when its just about right to start “planting”. I have found that if you let the wheat sprout well into this stage of growth, the overall success and health seems better. It also gives ALL the wheat a chance to sprout. Do not let the wheat dry out at this stage or you’re going to lose the crop.
Step 3: Preparing the bed
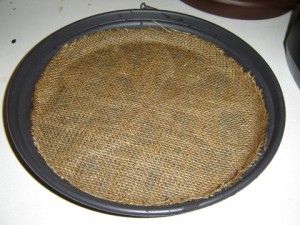
You are almost ready to “plant” this wheatgrass. All you do to prepare the medium for this planting is to cut two sheets of jute matting to suit the inner area (circle) of the planter tray. Cut it oversize slightly as just like pair of cheap pants, it will shrink when wet.
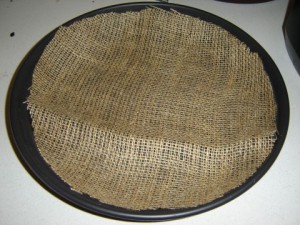
Jute mat trimmed to oversize slightly
Next, you wash the matting thoroughly a few times and then leave it wet (but not dripping wet).
Jute can hold up to 450% of its own weight in water!!
Thats a great alternative medium to soil/peatmoss!
Step 4: You make your bed, you sprout in it!
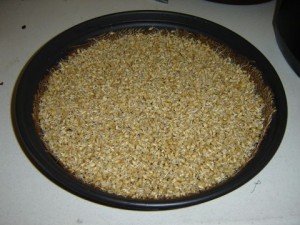
Its time to spread out the sprouted wheat evenly across the bed. Be VERY careful and gentle during this process. You dont want to damage the delicate wheat roots. You should end up with something that looks like this.
Mist the wheat lightly every 3-4 hours using the spray bottle. Keep this tray in the dark cupboard for a few days until you get shoots, 2 inches tall and are looking a light green/yellow.
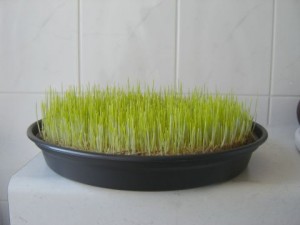
Tray at 3 days. Its going to suck the
nutrient water like nobody's business...
Then you can expose them to light by sitting the tray next to sunny window.
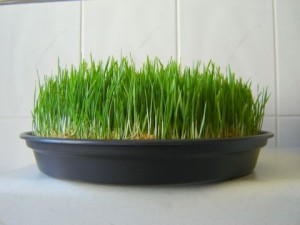
Tray at 5 days. I really believe you should
grow it in ambient sunlight (on a window sill)
Grow for as long as you feel is necessary, feeding the grass each day with the bottled nutrient solution.
You are well on the road to producing your own ocean minerals soilless mold-free ormus wheatgrass.

Comments are closed.